
Table of contents
Step-by-step: gatling load tests with TestContainers and Docker


Last updated on
Friday
January
2026
Step-by-step: Gatling load tests with TestContainers & Docker
In recent years, the number of production services running on containerization platforms like Docker has grown dramatically. This shift in deployment architecture has made load testing of containerized applications crucial. To address this need, we hosted a webinar with Oleg Šelajev from TestContainers (Docker ).
In this article, we'll give you a step-by-step guide on how to use TestContainers and Gatling to effectively load test your containerized applications, ensuring they perform optimally under real-world conditions. You can also access the replay of the Webinar we did on this topic.
Why should I load test containerized apps?
The integration of Gatling, TestContainers, and Docker offers a powerful toolkit for load testing containerized applications. This approach provides several key benefits:
- Realistic Testing Environment: TestContainers and Docker allow you to create a testing environment that closely mimics your production setup, resulting in more accurate and reliable test results.
- CI/CD Integration: As demonstrated, this setup integrates seamlessly into your CI/CD pipeline, enabling automated performance testing with every code change.
- Comprehensive Reporting: Gatling's detailed reports offer valuable insights into your application's performance under various load conditions.
- Flexibility: This setup enables testing both locally and in cloud environments, allowing you to choose the most suitable testing strategy for your needs.
Step-by-step guide to load test containerized apps
1. Setting Up the Project
First, ensure you have Gatling installed and set up. If you haven't already, download it from the official documentation.
Next, install TestContainers and Docker, you can check the TestContainers documentation and Docker's installation guide.
Finally, clone the project from GitHub and open the webinars/Docker folder.
2. Launching the Application
Before load testing your application, deploy it using TestContainers and Docker.
To do this, navigate to the TestContainers folder and run these two commands:
⚠️ Ensure Docker and TestContainers are running before launching the application (these commands will launch some Docker images) ⚠️
In the log, you'll see a Cloudflare URL. This URL allows you to access our application on the internet.

You can also check the README of the project to see the different endpoints of this API.
3. Launching the Gatling Simulation Locally
In this repository, we also have inside the gatling folder a Gatling simulation that allows us to load test our application. This simulation tests our website by defining two main parts of our scenario: AddProduct and FindProduct. It uses a CSV feeder to provide test data and sets up an HTTP protocol with a base URL and headers.
The test injects users with various patterns:
- A burst of 10 users
- A ramp-up of 10 users over 5 seconds
- A ramp-up from 10 to 20 users per second over 10 seconds
- A stress peak of 100 users over 20 seconds
The simulation includes assertions to ensure that all response times are under 50 milliseconds and that the success rate is above 95%. The AddProduct posts new product data to the API, while the FindProduct retrieves and verifies product information.
To launch the load test, open a terminal and run (The best practice is to run Gatling on another machine from the API):
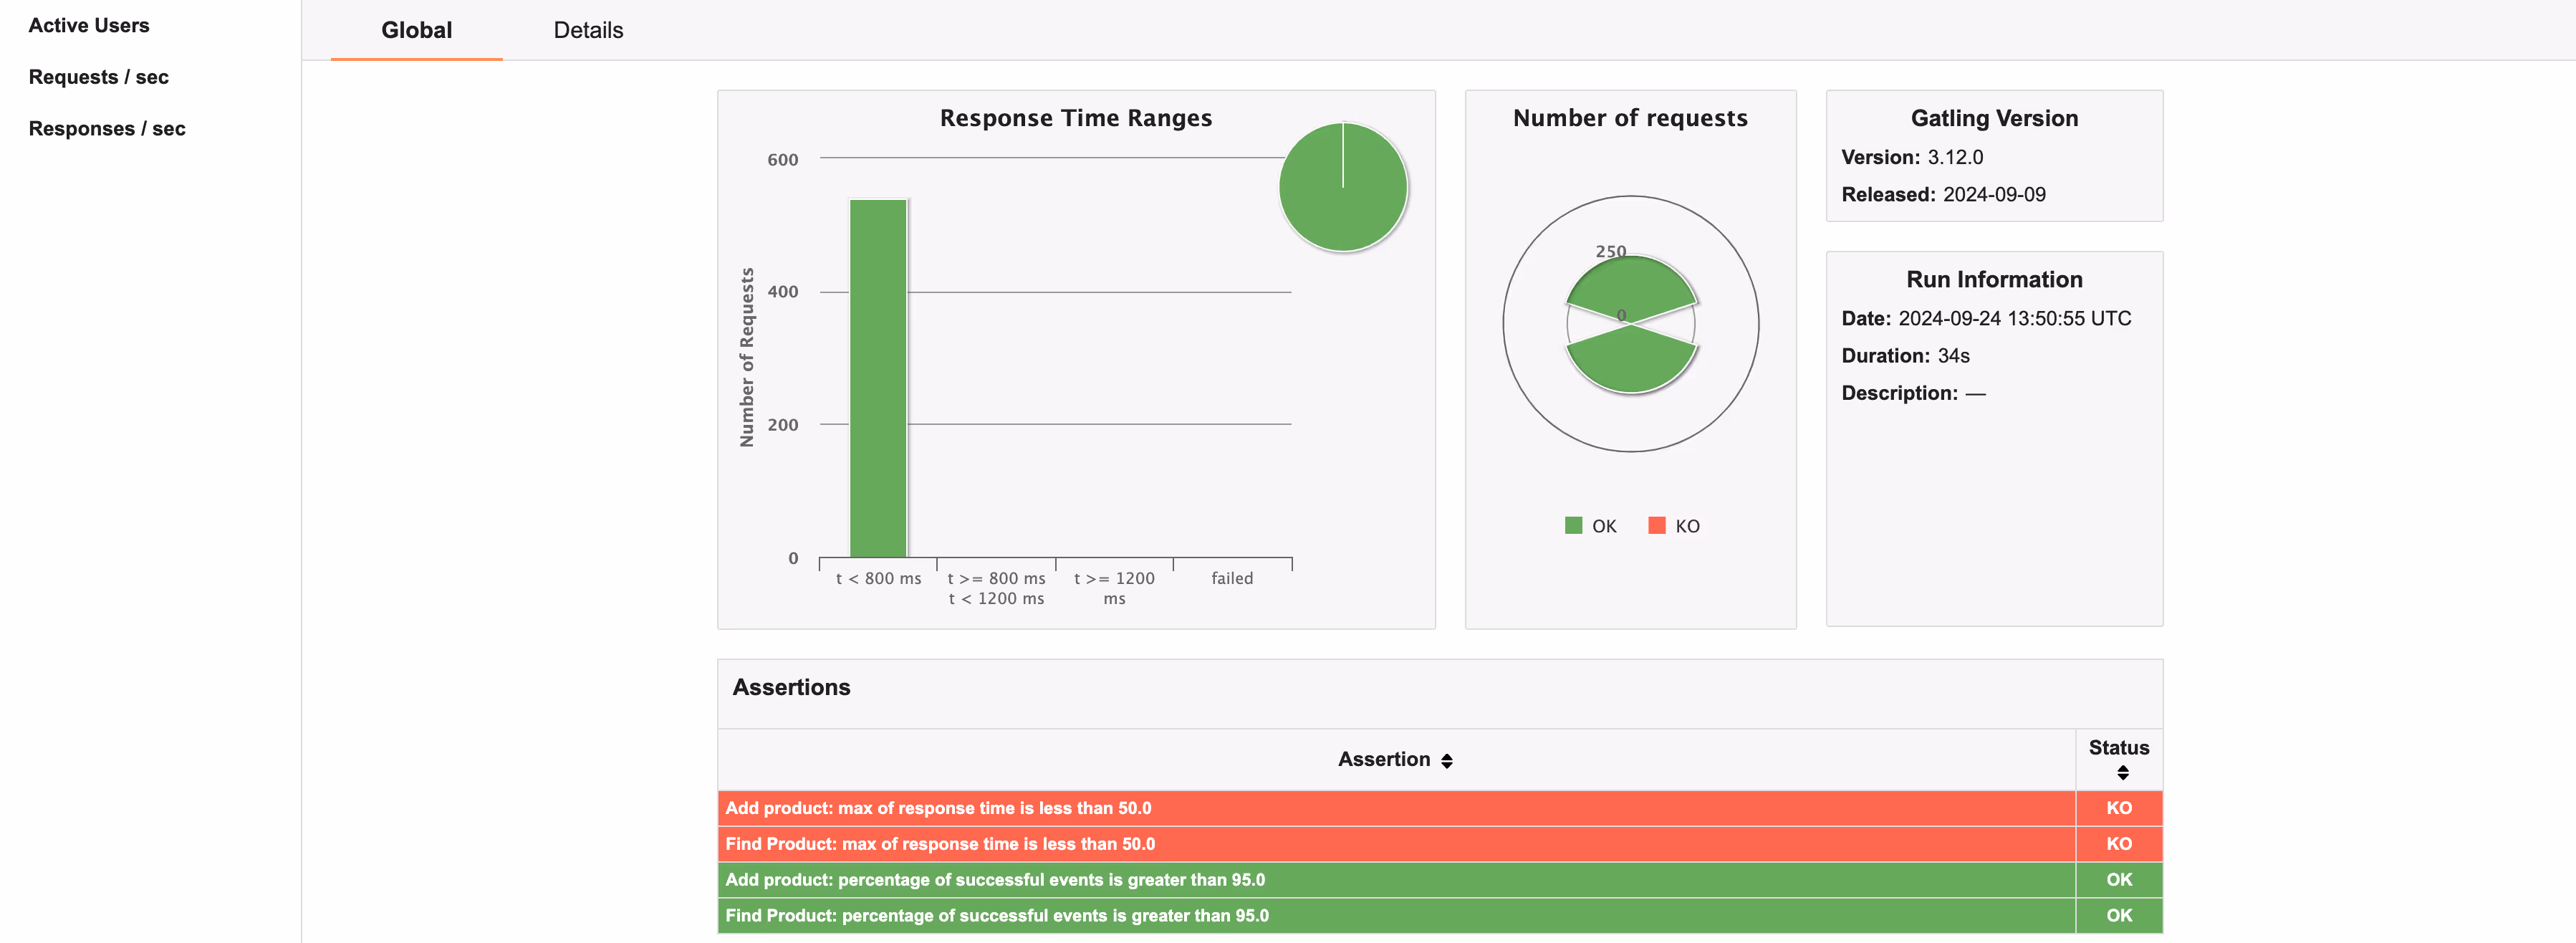
After the simulation is complete, Gatling generates an HTML link in the terminal to access your report. Review metrics such as response times, successful and failed connections, and other indicators to identify potential issues with your service. For instance, we observe that two of our assertions fail.
4. Launching the Gatling Simulation in CI/CD
We've explored the local load testing of your application using Gatling open-source..However, each developer commit triggers a CI/CD pipeline to test and deploy the application in an enterprise workflow.
Gatling Enterprise integrates seamlessly with GitHub Actions, GitLab, Buildkite, and other CI/CD tools.
Let's set it up with GitHub Actions and Gatling Enterprise.
Prerequisites
You'll need to create an API key with configure permission on Gatling Enterprise. Refer to our documentation for instructions. Also, add the GitHub action to your repository and set up the secret.
You can also check the GitHub Actions documentation to see the possible customizations.
Deploy the Package
To deploy your package on Gatling Entreprise simply run these commands in the gatling folder:
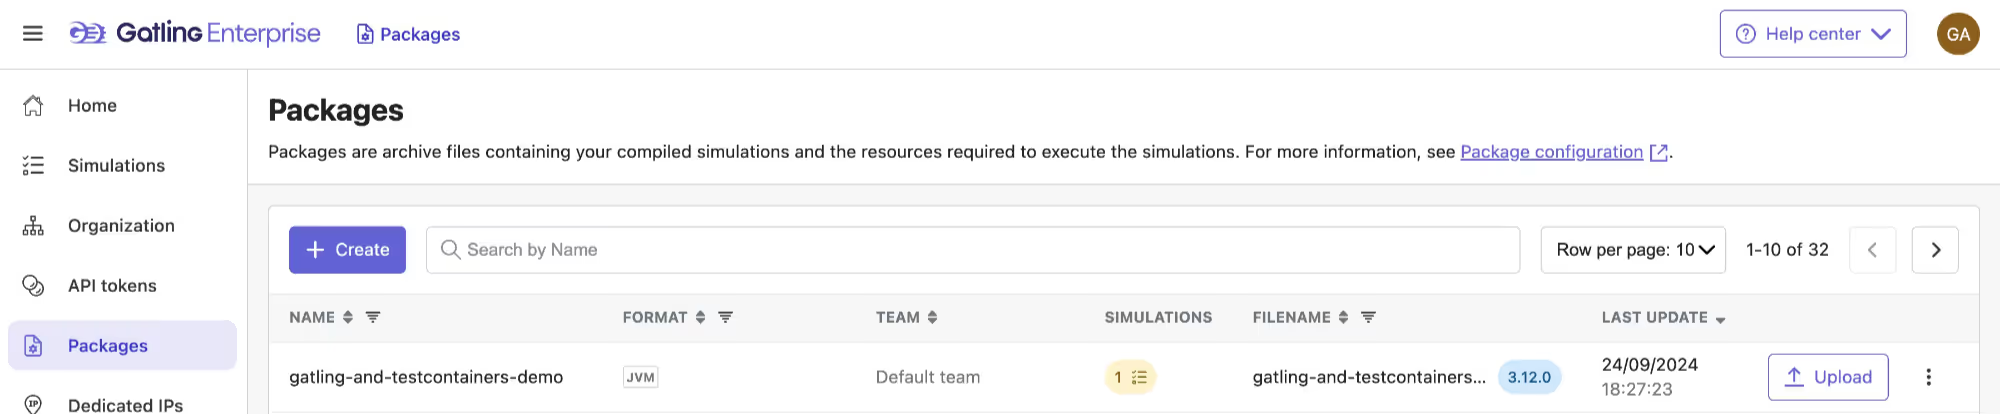
Now, if you navigate to Gatling Cloud → Package, you'll see a new package named gatling-and-testcontainers-demo.
Get the Simulation ID
Next, create a simulation by navigating to the "Simulations" tab and clicking "Create New." Select your package from the dropdown list, then click "Create" and configure your simulation settings.

Now, if you click on the "Simulations" tab on the left, you'll see a list of simulations. Click on the three dots next to your simulation and copy the simulation ID.
Launch the simulation
Now you can launch a simulation from your CI/CD. If you want your Gatling test to run automatically with each commit, you'll need to add this to your workflow.
To run the simulation manually, go to your GitHub repository and click on Actions → Run Gatling Enterprise Simulation. You'll see this:
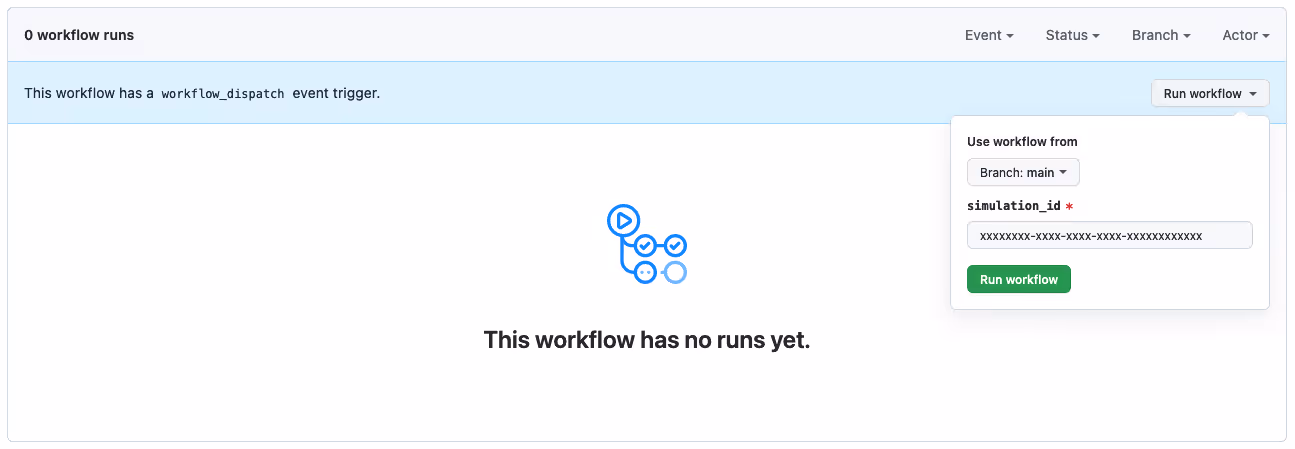
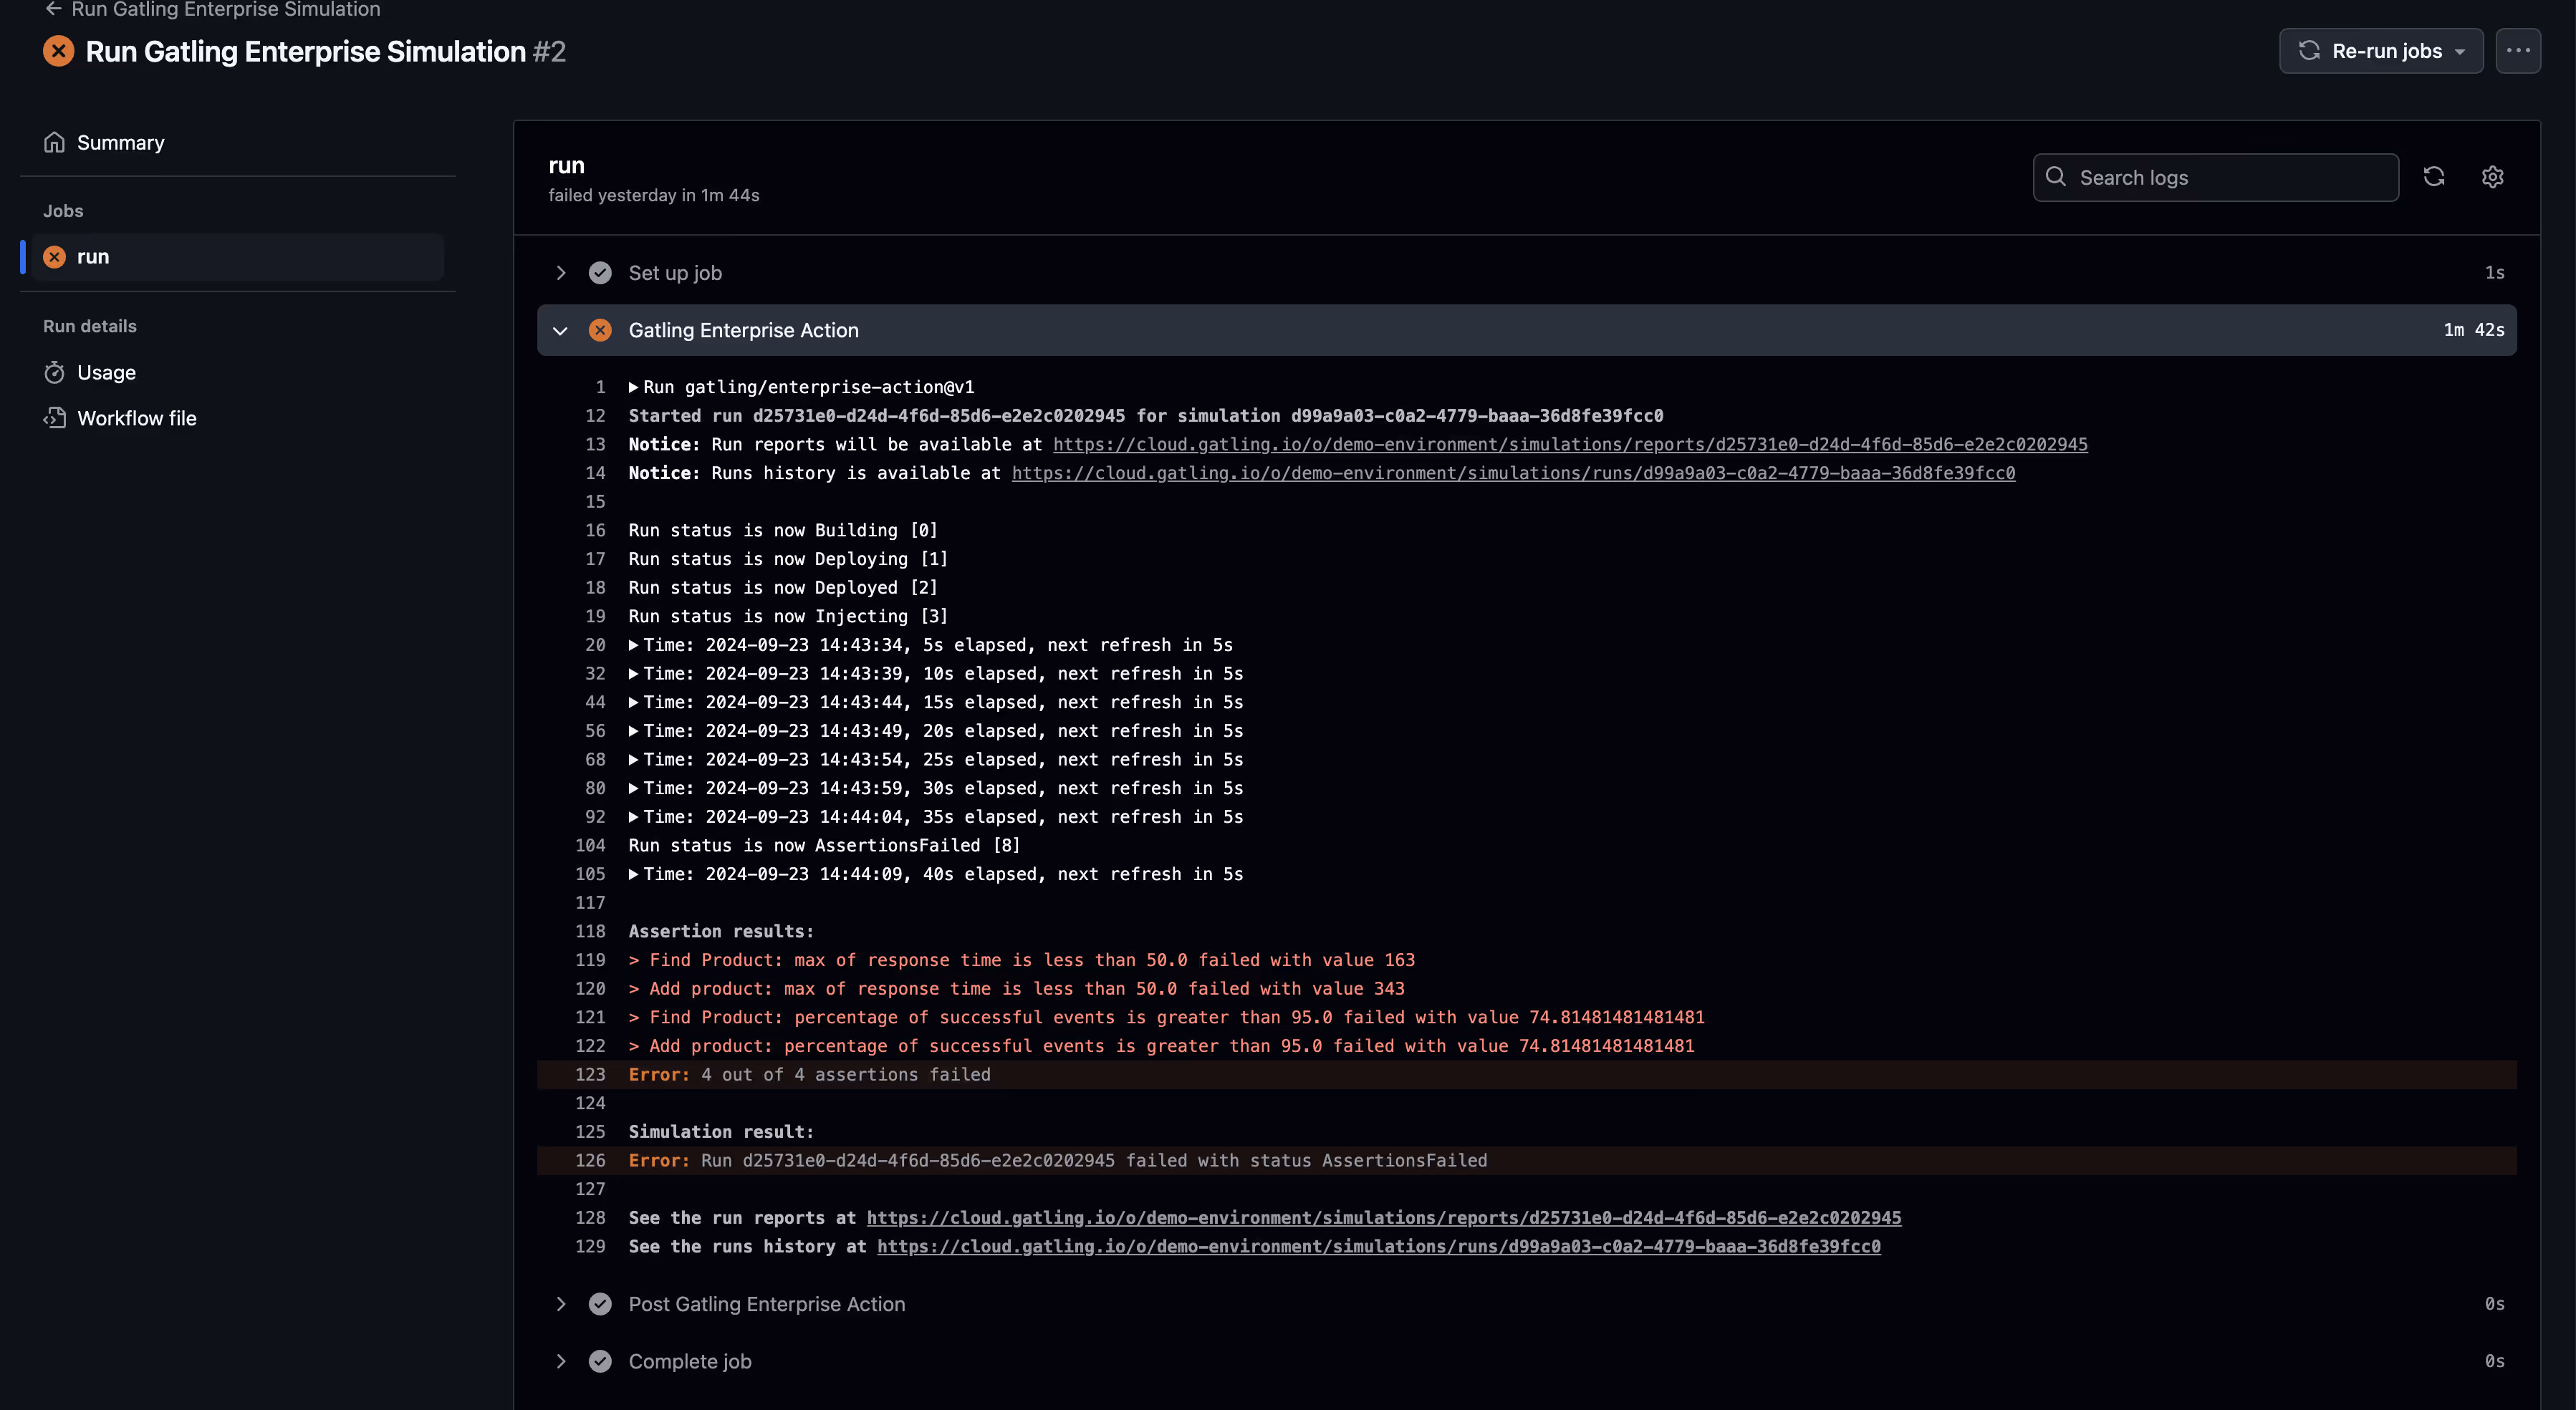
Simply paste your simulation ID and click "Run workflow." The GitHub action will trigger a new run for your simulation. You'll receive logs in your CI/CD pipeline and a detailed report on Gatling Enterprise.

You’ve streamlined your performance testing process by integrating Gatling Enterprise with GitHub Actions. This setup not only automates your load testing but also provides immediate feedback through Gatling Enterprise reports, helping you catch and address performance issues early in the development cycle.
Conclusion
Integrating Gatling, TestContainers, and Docker offers a powerful toolkit for load testing containerized applications. By following this guide, you can establish a robust load testing pipeline to ensure your containerized applications perform well under real-world conditions.
Remember to:
- Regularly update your test scenarios to reflect changes in your application
- Carefully analyze Gatling reports to identify and address performance issues
- Continuously refine your testing strategy based on insights gained from each test run
As containerization continues to dominate the deployment landscape, mastering these tools and techniques is crucial for maintaining high-performing and scalable applications.
For a more in-depth look at this topic, we recommend watching the replay of our webinar. In it, we provide a live walkthrough of this step-by-step guide. Additionally, we demonstrate how to implement effective load testing using Gatling, TestContainers and Docker.
FAQ
FAQ
Related articles


Ready to move beyond local tests?
Start building a performance strategy that scales with your business.
Need technical references and tutorials?
Minimal features, for local use only
