Gatling installation
Learn about the Java, Kotlin and Scala requirements, install Gatling with the Bundle or build tool: Maven, sbt, Gradle.
Prerequisites
Java Version
Gatling supports 64bits OpenJDK LTS (Long Term Support) versions: 11, 17 and 21. Other JVMs such as 32bits systems or OpenJ9 are not supported.
Supported Languages
Since 3.7, Gatling supports writing tests in Java, Kotlin and Scala. Older Gatling versions only support Scala.
Gatling version
3.10.5.In particular, don’t use milestones (M versions) you could find on maven central, those are not documented and released only for internal use or Gatling Enterprise customers.
Using the Bundle
You can use Gatling as a standalone bundle. Then, you’ll just need a text editor, possibly with Java or Scala syntactic coloration, to edit your simulations, and you’ll be able to launch Gatling from the command line.
To install the bundle, download and extract the following ZIP file:
Use the scripts located in the bin directory for launching Gatling and the Recorder.
In order to run Gatling, you need to have a JDK installed. Gatling requires at least JDK11. Then, we recommend that you use an up-to-date version.
For all details regarding the installation and the tuning of the operating system (OS), please refer to the operations section.
JAVA_HOME env var if it’s set.
Depending on your setup, you might end up running a different version than the one displayed with java -version.
If you get strange errors such as Unsupported major.minor version and you were expecting to run a JDK11 or newer, you might want to explicitly set the JAVA_HOME env variable.The bundle structure is as follows:
bin: launch scripts for Gatling and the Recorder.conf: configuration files for Gatling, Akka and Logback.lib: Gatling and dependencies binariesuser-files:simulations: where to place your Simulations code. You must respect the package folder hierarchy.resources: non source code files such as feeder files and templates for request bodies.lib: you can add you own dependencies (JAR files) here. When running on Gatling Enterprise, they are packaged in a single “fat JAR” file together with your Simulations code.
results: where test results are generated.
Using a Build Tool
Maven
Maven can be used for Gatling projects with Java, Kotlin and Scala.
Gatling provides an official maven plugin named gatling-maven-plugin. This plugin lets you compile your code and launch Gatling simulations.
Check the Maven plugin documentation for more information.
Gradle
Gradle can be used for Gatling projects with Java, Kotlin and Scala.
Gatling provides an official gradle plugin named io.gatling.gradle. This plugin lets you launch your Gatling simulations.
Check the Gradle plugin documentation for more information.
sbt
sbt can be used for Gatling projects with Scala only.
Gatling provides an official sbt plugin named gatling-sbt. This plugin lets you launch your Gatling simulations.
Check the sbt plugin documentation for more information.
Using an IDE
You can edit your Simulation classes with any text editor, maybe with some syntactic coloration for your chosen language. But if you are a developer, you’ll most likely want to use your favorite IDE with Gatling.
IntelliJ IDEA
IntelliJ IDEA Community Edition comes with Java, Kotlin, maven and gradle support enabled by default.
If you want to use Scala and possibly sbt, you’ll have to install the Scala plugin, which is available in the Community Edition.
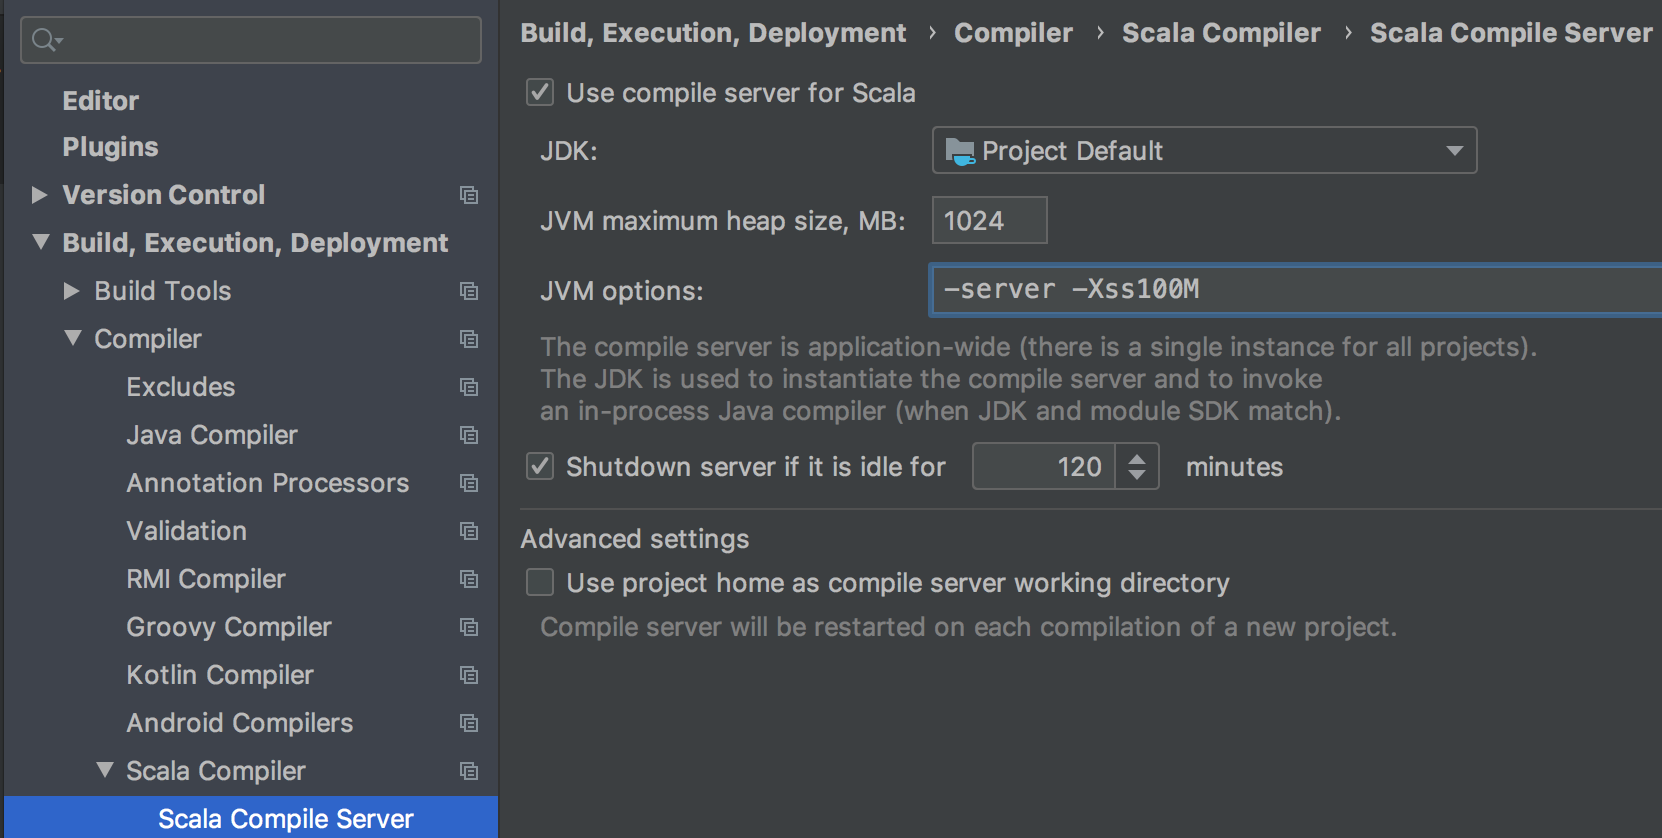
You’ll most likely have to increase the stack size for the scala compiler, so you don’t suffer from StackOverflowErrors.
We recommend setting Xss to 100M.
VS Code
We recommend that you have a look at the official documentation for setting up VS Code:
Launching Gatling and the Recorder from the IDE
All maven, gradle and sbt demo projects contain some helper classes you can use to trigger some Gatling tasks.
You can right-click on the Engine class in your IDE and launch the Gatling load test engine.
Simulation reports will be written in your target directory.
You can right-click on the Recorder class in your IDE and launch the Recorder.
Simulations will be generated in you src/test/sources directory.