Getting started with the no-code generator
Learn how to write your first test with the Gatling no-code generator
This tutorial describes step-by-step instructions for running your first simulation with Gatling Enterprise Cloud.
Requirements
- A Gatling Enterprise Cloud account. Sign up for a free trial if you don’t already have an account.
Introduction
The Gatling no-code generator is the fastest way to discover load testing and how it can improve your application, microservice, or API. The no-code generator is a graphical user interface that lets you:
- setup your scenario,
- setup the virtual user injection profile,
- (optional) define acceptance criteria,
- select a testing location.
Once you start your simulation, the load testing data are displayed in real-time. The following guide assists you in writing and launching your first load test. To keep learning about Gatling and load testing, see these helpful resources:
Access Gatling Enterprise Cloud
To access the Gatling no-code generator:
- Navigate to https://cloud.gatling.io in your web browser.
- Login or register if you don’t have an account.
- Click on Create a simulation without coding in the Latest simulation runs pane on the landing page.
The no-code generator is divided into 4 steps with a dynamically updated code example in Java, Scala, and Kotlin. The code example shows you how the resulting simulation can be written in your preferred programming language.
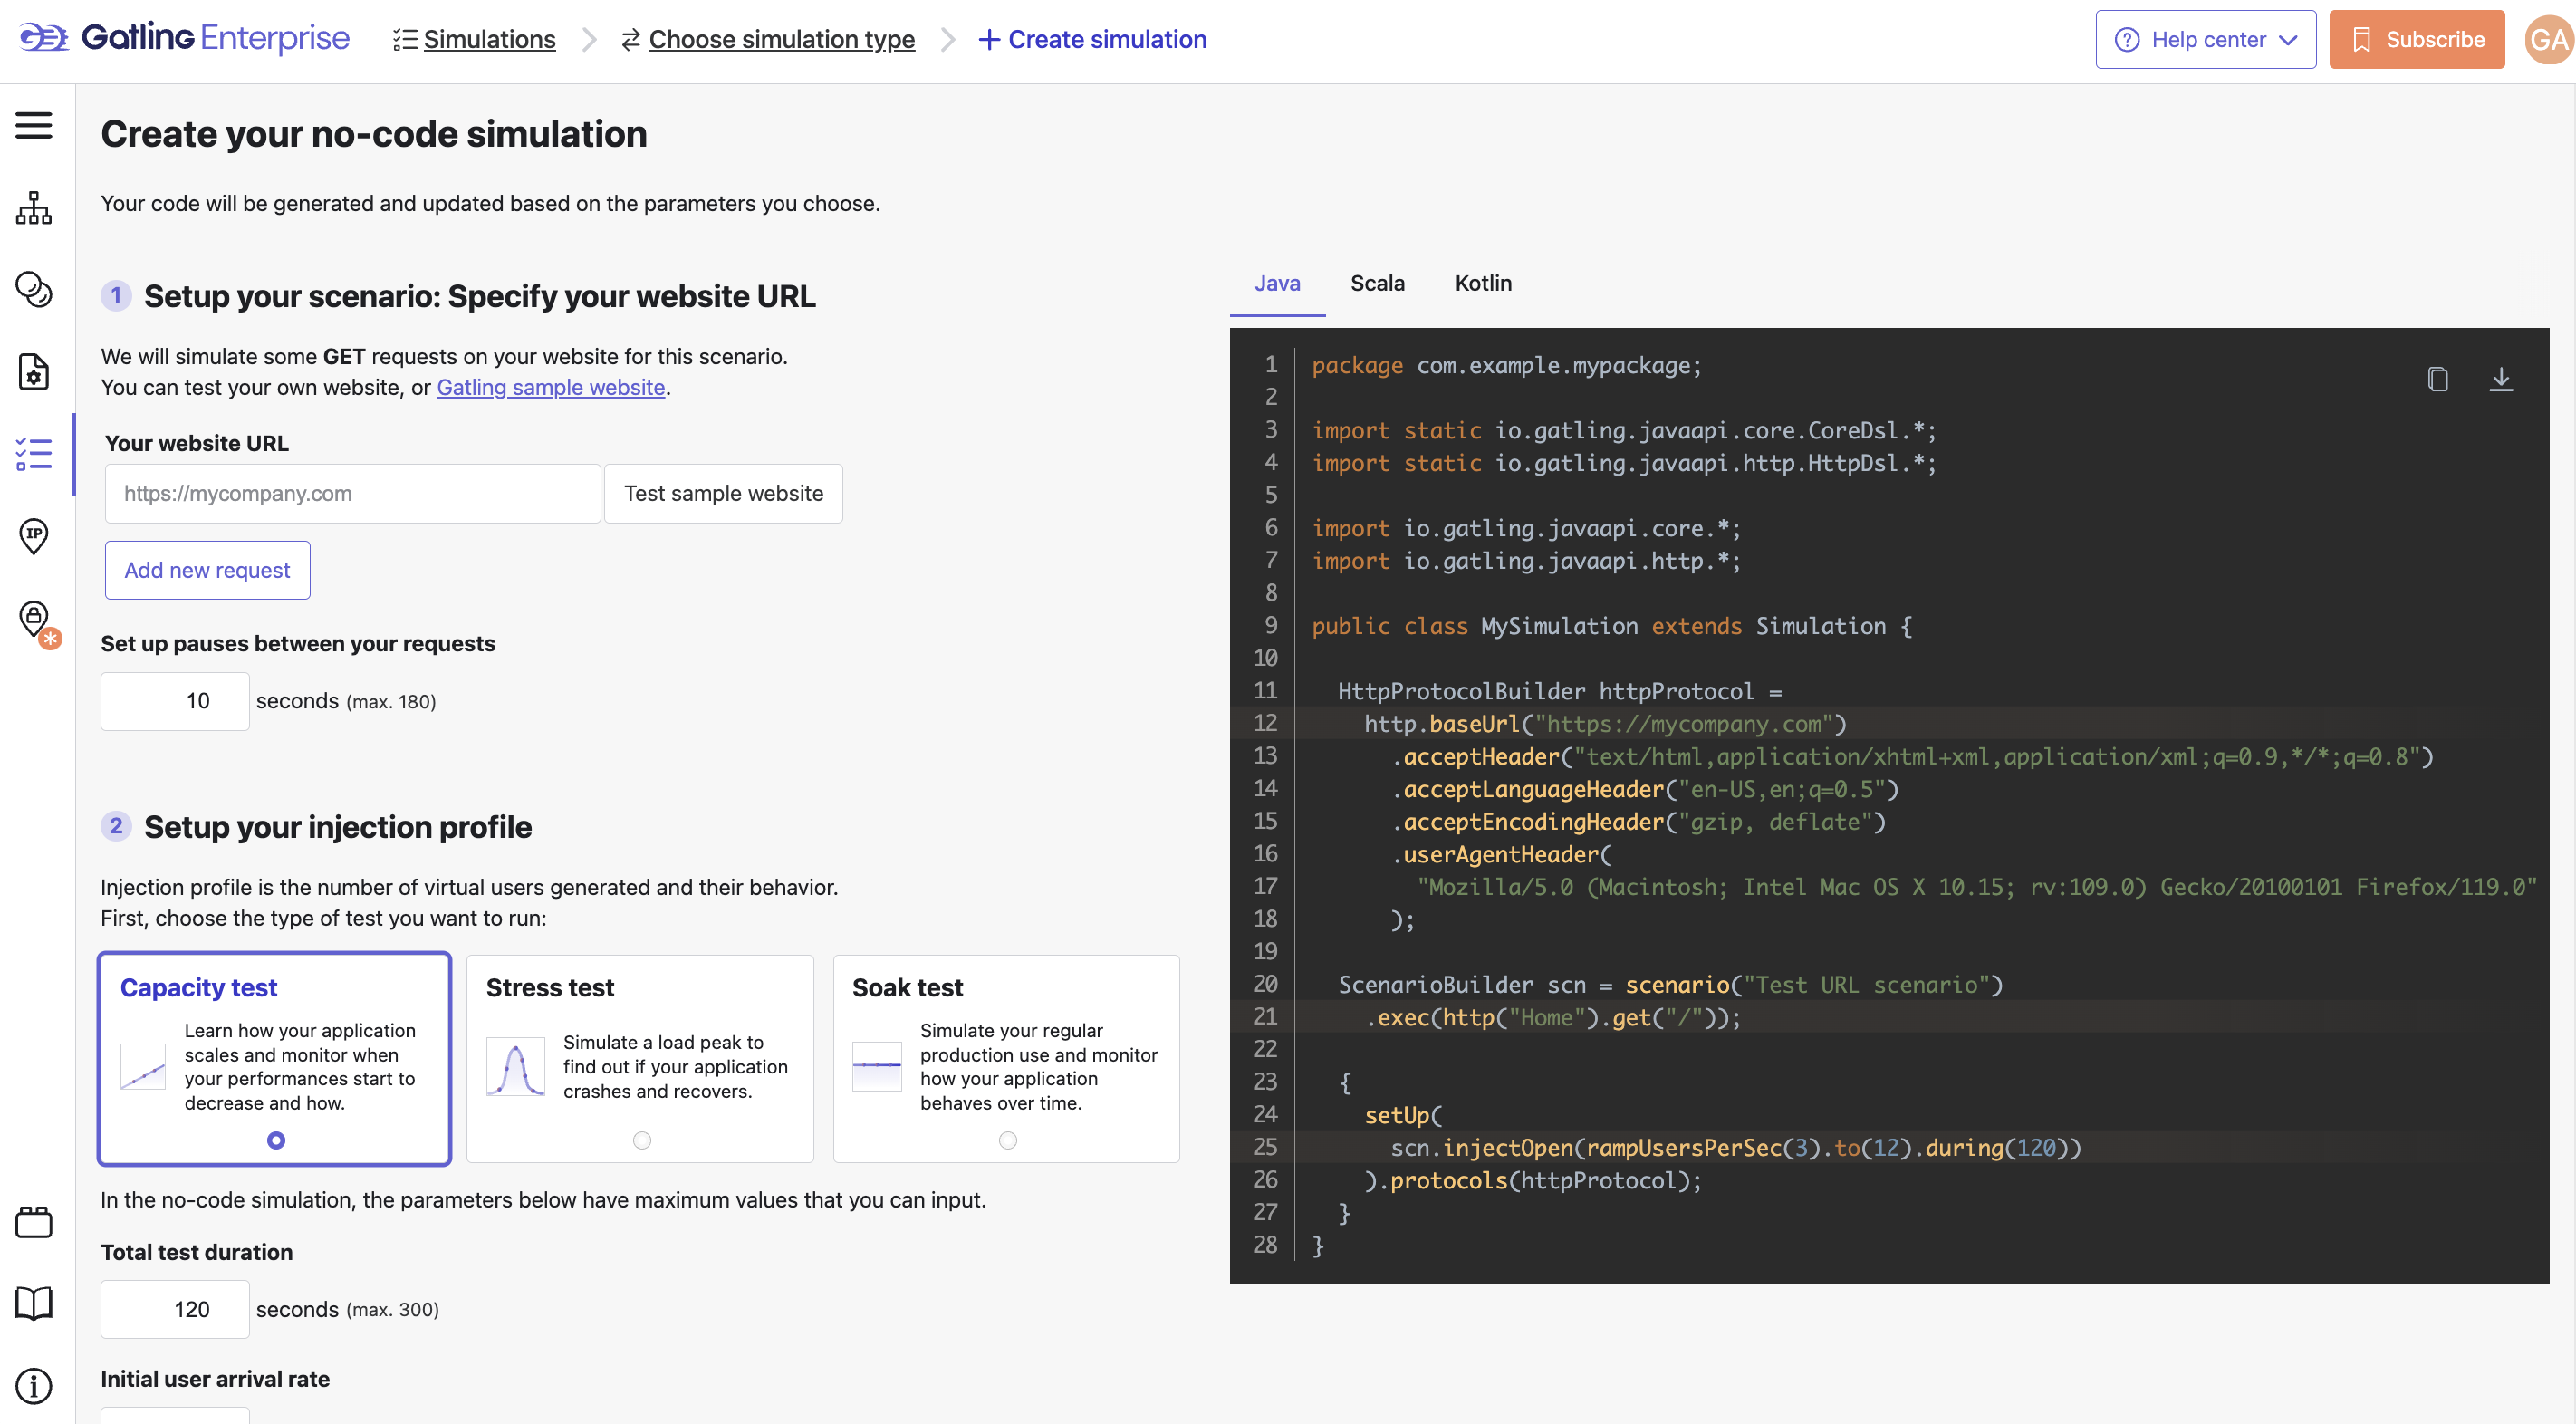
Setup your scenario
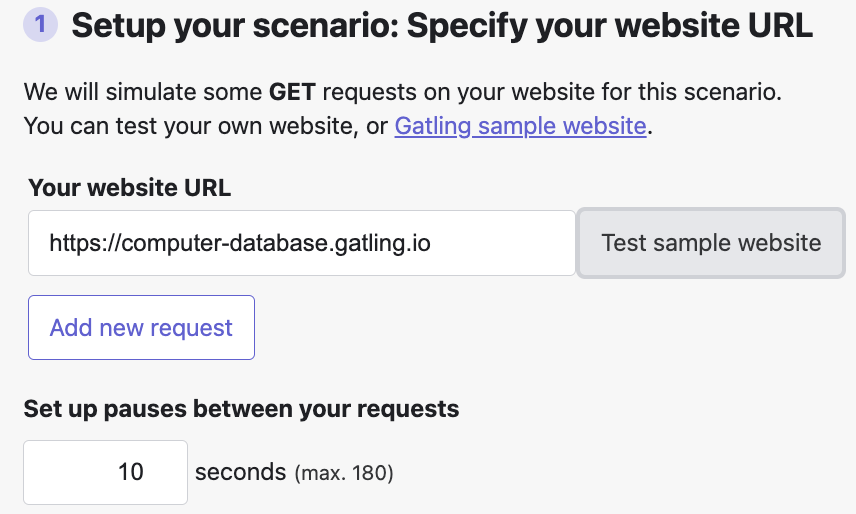
Setting up a scenario requires defining the user request(s) and any pauses between the user request(s). For this tutorial, we use the Gatling sample website https://computer-database.gatling.io to demonstrate load testing with the no-code generator. To set up the scenario, click Test sample website under the Your website URL heading.
Setup the injection profile
The second step in creating a no-code simulation is setting up the injection profile. This is where you have the most options for describing the test. There are 3 broad categories of tests:
- Capacity tests tell you how your application performs as resource demand increases.
- Stress tests tell you how your application performs when there is a rapid and transient increase in resource demand.
- Soak tests tell you how your application performs with a regular load over a long period of time (e.g., test for memory leaks).
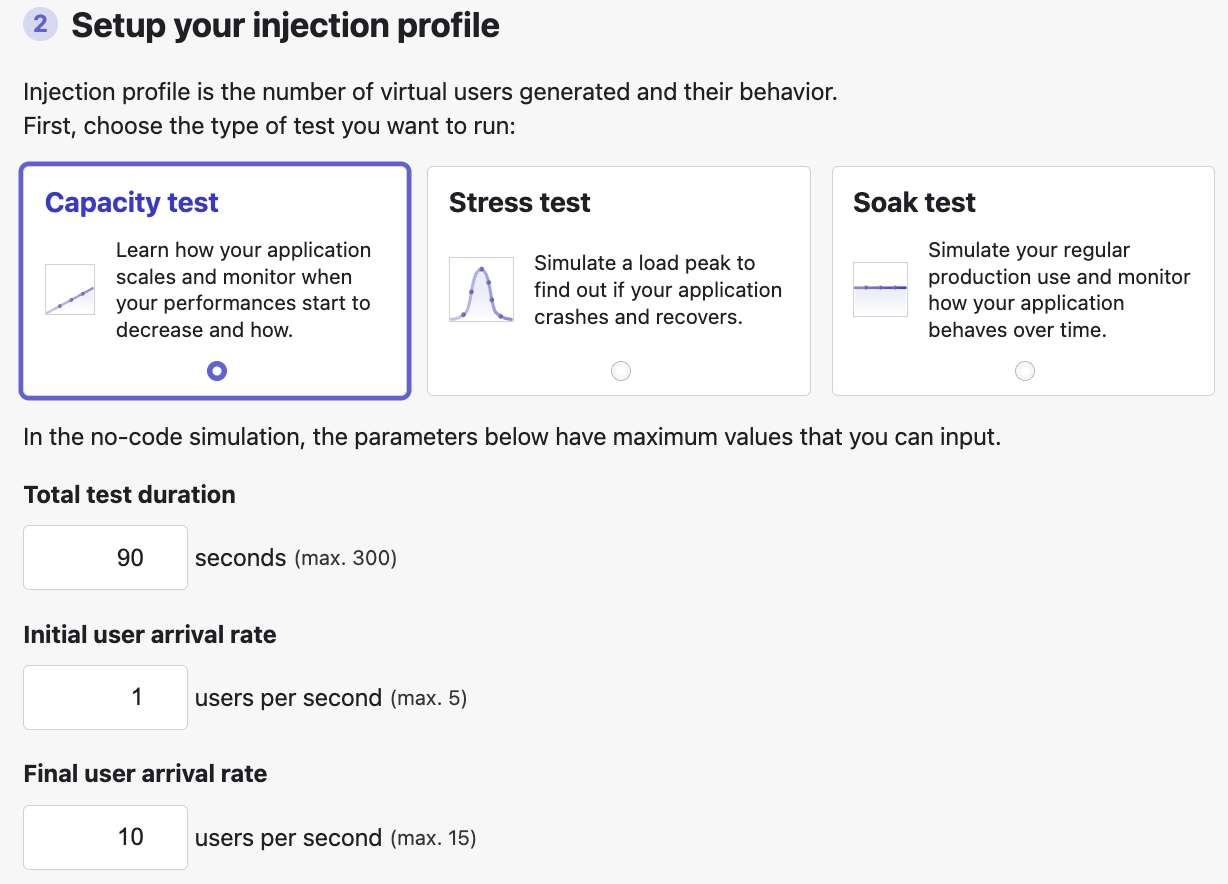
Following the test type, inputs describe the test duration and the user injection profile. For this tutorial:
- Select Capacity test.
- Enter 90 seconds for the total test duration.
- Enter 1 for the initial user arrival rate.
- Enter 10 for the final user arrival rate.
Define acceptance criteria (optional)
Acceptance criteria, also called Assertions, allow you to establish whether or not a simulation result meets your requirements. For example, if you expect 95% or more of your users to experience a response time of 0.25 seconds or faster, you would set the 95th percentile response time to 0.25.
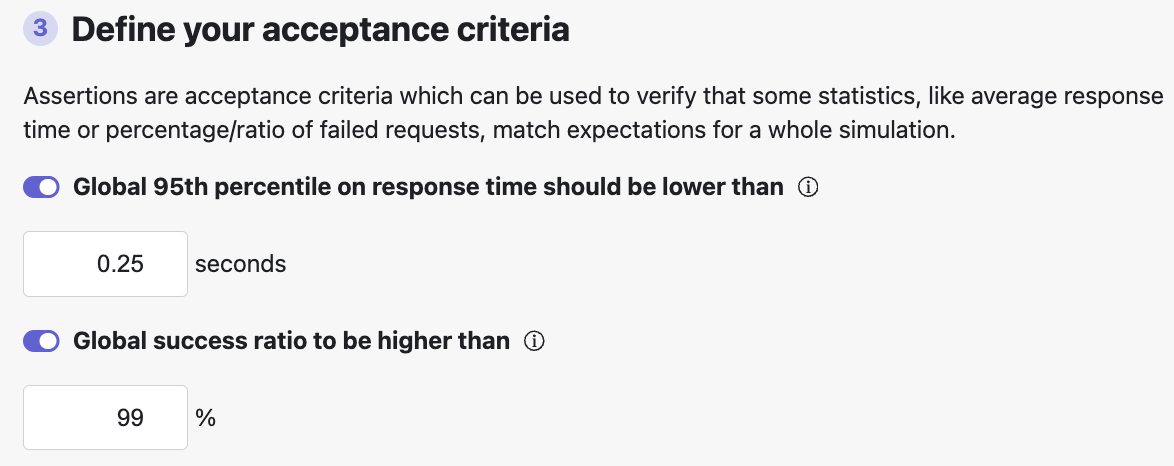
To activate acceptance criteria:
- Click Global 95th percentile on response time should be lower than toggle button to enable the criterion.
- Enter the value 0.25 in the input field.
- Click Global success ratio to be higher than toggle button to enable the criterion.
- Enter the value 99%.
Select the testing location
The final step for defining your no-code simulation is to select the traffic origin location.
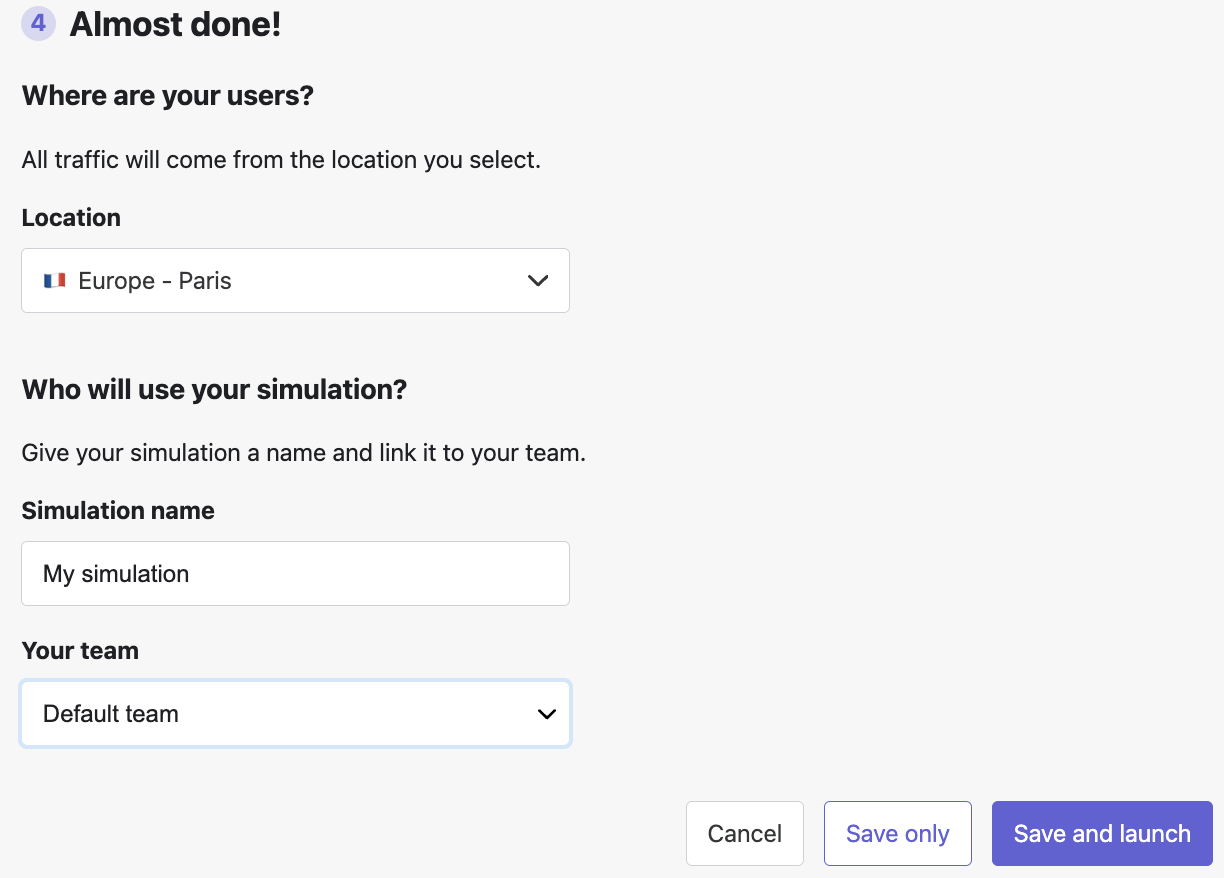
Under the Location heading, click the arrow to open the dropdown menu and select a location from the list. The Gatling test web application is hosted near Paris, so this location usually gives the best performance.
Finally, name your simulation and select a team (usually default).
Launch the test
Click the Save and launch button to launch your no-code simulation.
Congratulations, you have finished your first load test with Gatling Enterprise Cloud. The results are displayed in real-time. At the end of the simulation, you can explore the results. Make sure to visit the Report tab to see the detailed results, including:
- response time percentiles,
- connections,
- DNS resolutions.
To keep exploring the no-code generator, click the Edit simulation button and change your simulation. For example, try changing the load generator location to AP SouthEast - Sydney to see how users further away from the Gatling test web application experience different response times. Happy testing!