Simulations
Navigate through simulations.
Managing Simulations
To access the Simulations section, click on Simulations in the navigation bar.
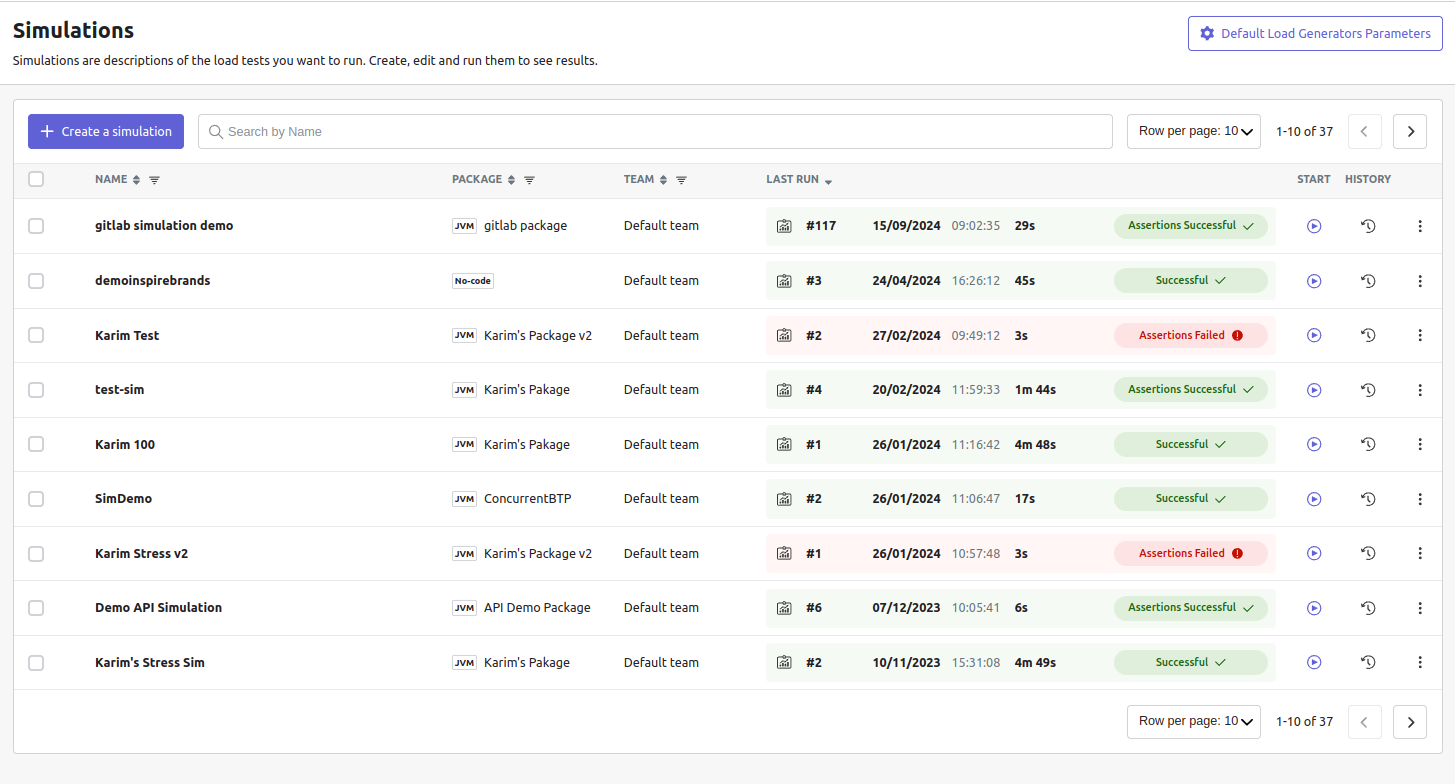
The Simulations view contains all the simulations configured by your organization and the results of their last run.
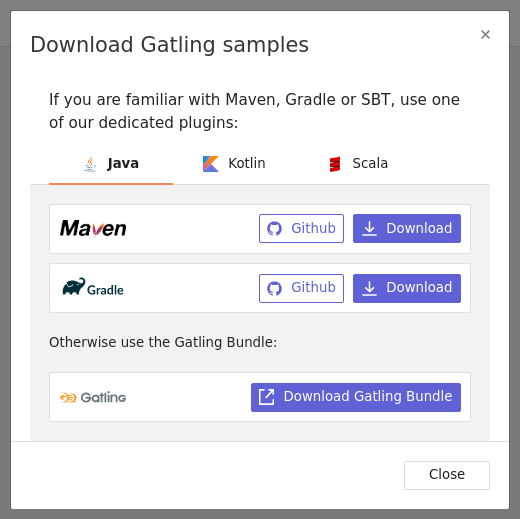
If you don’t have any simulations configured yet and don’t know where to start, you can download some Gatling Enterprise pre-configured projects by clicking on the Sample simulations button at the top right corner of the page.

Samples are distributed under:
- Scala with Maven, Gradle, sbt and Gatling Enterprise Bundle
- Java with Maven, Gradle and Gatling Enterprise Bundle
- Kotlin with Maven and Gradle
Back to the Simulations section, at the top, there is an action bar which allows several actions:
- Filter the simulations by name, or team name
- Create a simulation
- Edit default load generator parameters
- Delete selected simulations
Default Load Generator Parameters
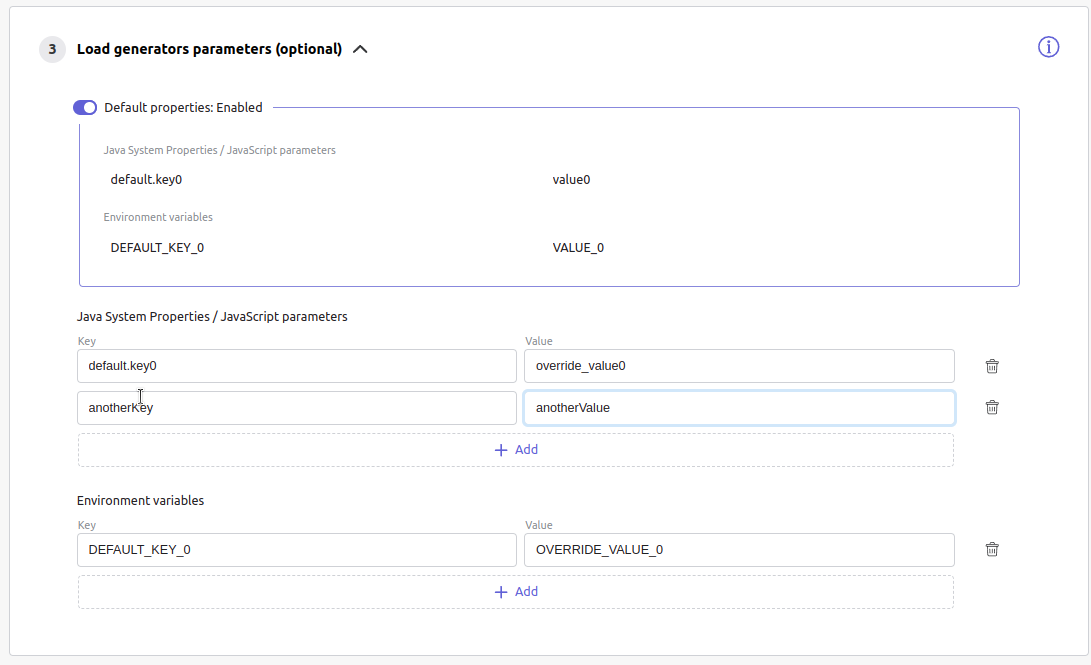
Default load generator parameters contains every Java system properties and environment variables used by all of your simulations by default. Editing those properties will be propagated to all the simulations. You can access the form by clicking the button in the top right corner of the page.
If you want to define such properties, check Enable default properties.
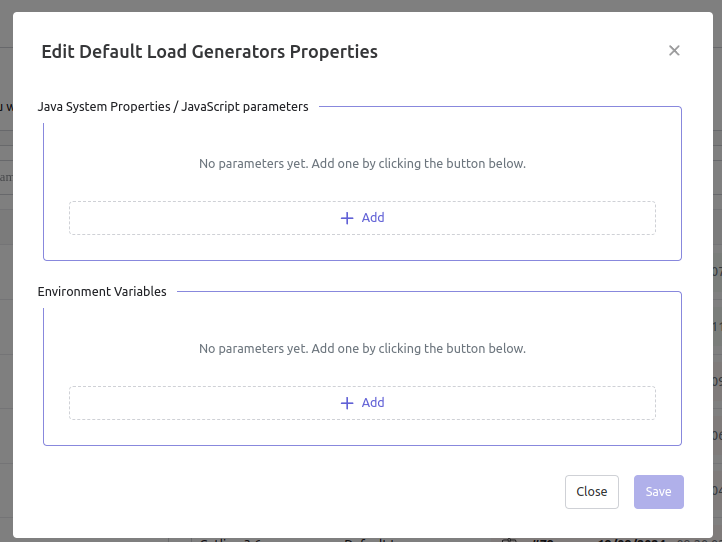
If you want specific properties for a simulation, you will be allowed to ignore those properties by checking the Ignore defaults box when creating or editing the simulation:
Creating a simulation
In order to create a simulation click on the “Create” button in the simulations table. There are 4 steps to create a simulation, 2 of which are optional.
Step 1: General
In this step, you will define the simulation’s general parameters.
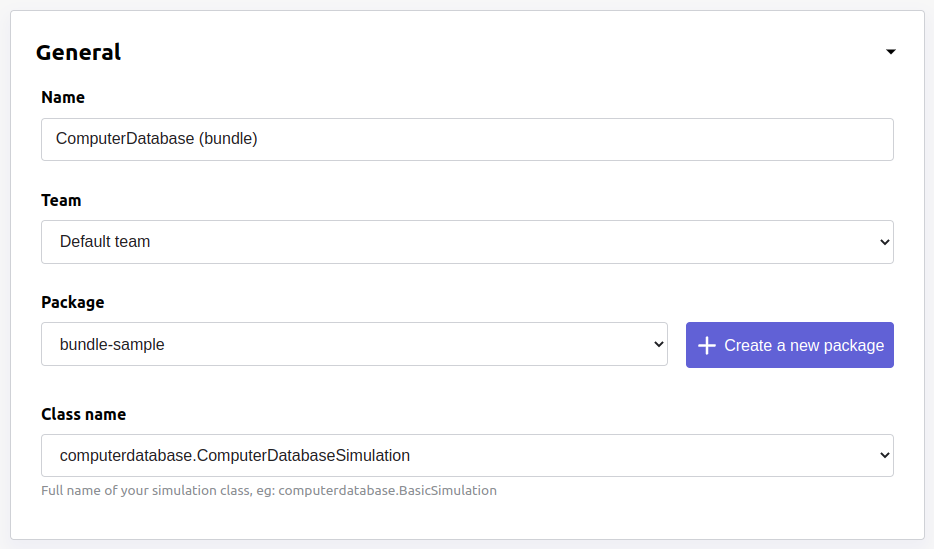
- Name: the name that will appear on the simulations table.
- Team: the team which owns the simulation.
Package and Class name
If you already have created the package you want to use, you can select it via the Package dropdown menu (it must belong to the selected team).
If you did not create your package before, you can click the Create a new package button. You will then be prompted with the package creation form.
Once your package is selected you will be able to select the Class name, the simulation’s fully qualified name, detected in the selected package.
Step 2: Locations configuration
In this step, you’ll configure the locations used for the Gatling Enterprise load generators.
You can either use the public locations provided by Gatling Enterprise Cloud, or use your own private locations
Gatling Enterprise public locations are available in the following regions:
- AP Pacific (Hong kong)
- AP Pacific (Tokyo)
- AP Pacific (Mumbai)
- AP SouthEast (Sydney)
- Europe (Dublin)
- Europe (Paris)
- SA East (São Paulo)
- US East (N. Virginia)
- US West (N. California)
- US West (Oregon)
If you want to use private locations, please refer to the specific documentation.
In order to get the best results from your simulation you should select the load generators that best represent your user base.
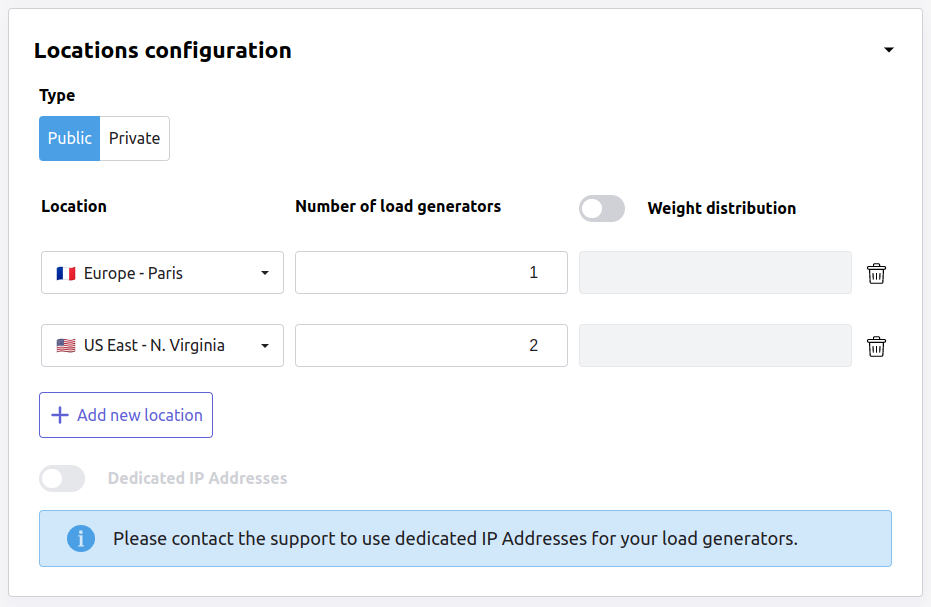
- Location: defines the locations to be used when initiating the Gatling Enterprise load generators.
- Number of load generators: number of load generators for this location.
- Weight distribution: by default, every load generator will produce the same load. If enabled, you must set the weight in % for each location (e.g. the first location does 20% of the requests, and the second does 80%). The sum of all weights must be 100%.
- Dedicated IP Addresses: Check if you want to enable dedicated IP addresses for your load generators. Only available for public locations.
You can add several locations with different numbers of load generators to run your simulation.
After this step, you can already save the simulation, or continue with optional configurations.
Step 3: Load Generator Parameters (optional)
This step allows you to define the Java system properties and environment variables used when running this particular simulation. Properties/variables entered here will add to the defaults, unless you choose to ignore the defaults. If you keep the defaults, and you add a property/variable with the same key as one from the defaults, the simulation’s value will be used (it overrides the default).
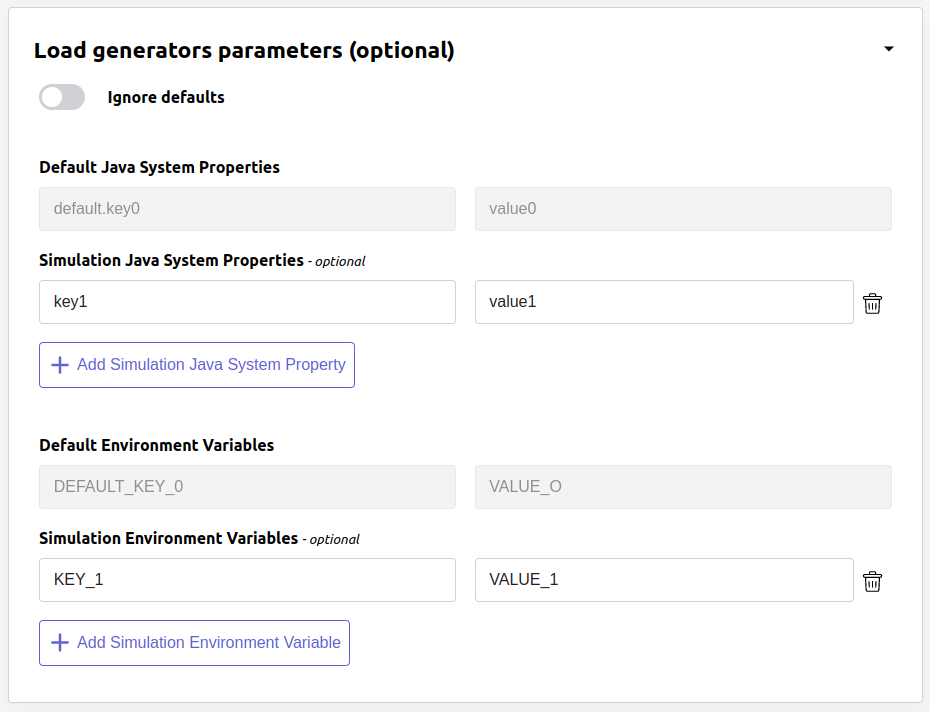
sensitive., and environment variables if you prefix them with SENSITIVE_.You can configure the gatling.enterprise.groupedDomains Java System property to group connection stats from multiple subdomains and avoid memory issues when hitting a very large number of subdomains.
For example, setting this property as .foo.com, .bar.com will consolidate stats for sub1.foo.com, sub2.foo.com, sub1.bar.com, sub2.bar.com into *****.foo.com and *****.bar.com.
System properties can be retrieved in your Gatling simulation with System.getProperty("YOUR_PROPERTY_KEY").
Environment variables can be retrieved in your Gatling simulation with System.getEnv("YOUR_ENV_VAR_KEY").
Step 4: Time window (optional)
You can configure some ramp up/down time windows to be excluded when computing assertions. This is typically useful when you know that at the beginning of your test run you’re going to expect higher response times than when your system is warm (JIT compiler has kicked in, autoscaling has done its work, caches are filled…) and don’t want them to cause your assertions to fail.
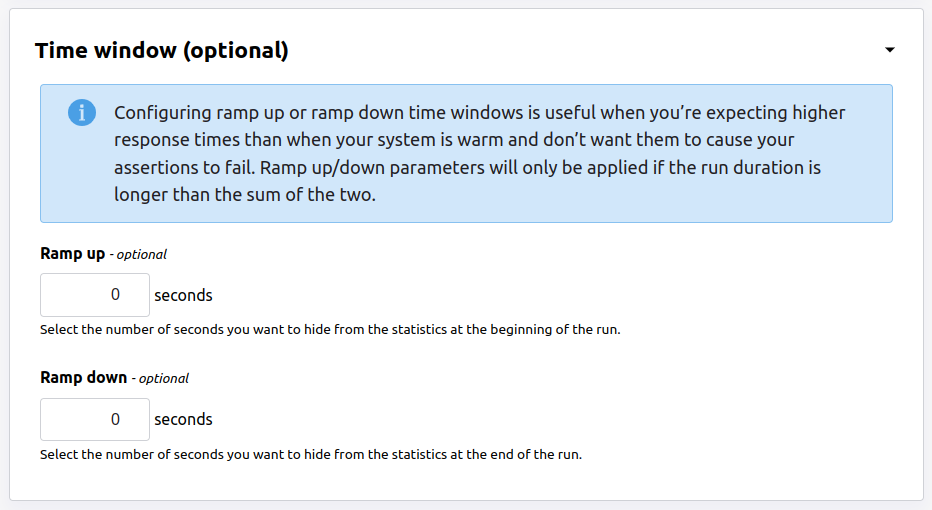
- Ramp Up: the number of seconds you want to exclude at the beginning of the run.
- Ramp Down: the number of seconds you want to exclude at the end of the run.
Simulations table
Once you have created a simulation, you can start it by clicking on the icon.

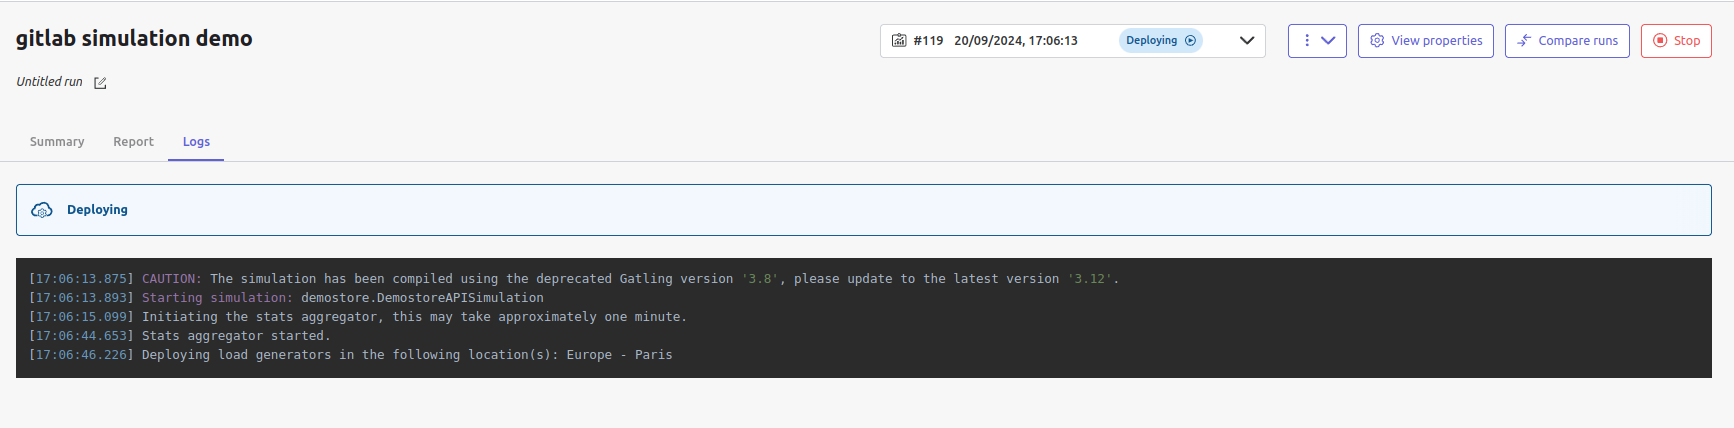
A run has the following life cycle:
- Building: in which it will download the simulation package and prepare the hosts.
- Deploying: in which it will deploy the simulation to run on all the load generators.
- Injecting: in which the simulation is running and can be viewed from the Reports.

Logs
By clicking on the second icon on last column, Gatling Enterprise will display the build logs of the simulation. There is a limit of 1000 logs for a run.
Viewing the Log can also be helpful in determining why a run failed and what errors you will need to correct to successfully run your simulation.
The logs can also be viewed in the Reports, while the simulation is building.
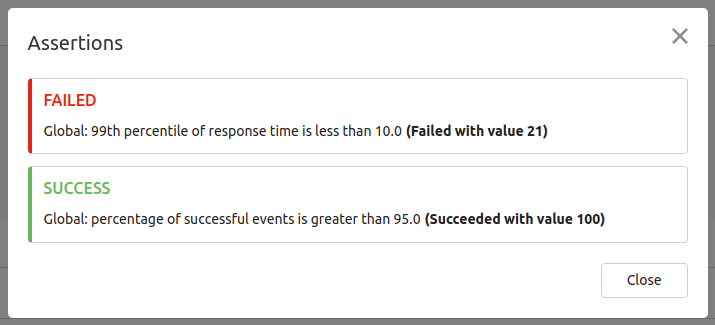
You can click on the third icon on last column to display the assertions of the run. Assertions are the assumptions made at the beginning of the simulation to be verified at the end:
Useful tips
- You can edit, copy the ID, duplicate and delete the simulation by clicking on the kebab menu icon
- You can search a simulation by its name, or its team name
- You can sort the simulations by any column
- A Delete button will appear on the action bar when you select a simulation, you will be able to delete all the selected simulations
- When a simulation is running, you can stop the ongoing run by clicking on the Stop button
Be aware that deleting a simulation will delete all the associated runs.